

The best way to get to grips with anything, is to use it, so a day out photographing was planned. We headed up to the beautiful Lake District. The good thing about photographing nature and landscape, is unlike people it won't get bored of waiting for you to figure out what setting you need to put your camera on.
Here are a few things to remember when taking photos.
Think about Composition
 It's important to think about the composition of your photograph - the position of the different elements in the frame. The simplest rule of thumb to learn and remember is the Rule of Thirds. You will need to split your frame into nine squares. This makes a more dramatic and visually interesting photo, than one where the subject is dead in the centre. Many newer cameras have a rule of thirds overlay that you can switch on when shooting.
As an example if, you are taking a photo of landscape with sky in, you should have 2 thirds of the photo sky and 1 third land, or 2 thirds land and 1 third sky. It will depend on what you want the focus in the photograph to be. If there sky looks particularly dramatic, or it is sunset, you will probably want 2 thirds sky.
 |
Think About Lighting
There are 3 ways you can manipulate the amount of light you allow into your image, the shutter speed, aperture size and ISO. You will need to consider how dark it is, if you want the background to be out of focus and if you want some artistic blur. This Exposure Triangle can help to explain the purpose of those three features.The Exposure Triangle

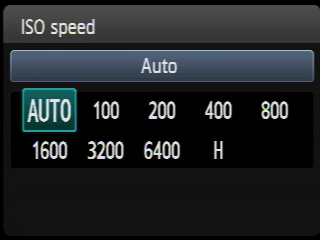 Adjust the ISO
There is an option to put the ISO on Auto and let the camera decide for you, but the sooner you can start adjusting this and making a decision about how you want your camera set up the better. For a very bright sunny day you want to set it is an ISO of 100. If it is beginning to get dark or you are taking photos indoors you will need to move the ISO up. The best thing is to start at 100 and move up from there. The higher the ISO the more grainy the photo will be.

Aperture priority mode
You can adjust the aperture on the camera when it is either in manual mode or Aperture priority mode. On the Canon camera, it is located on the wheel as AV (aperture value), on the Nikon, it is A. The lower the aperture number, the larger the aperture is and the shallower the depth of field. So an aperture of f1.4 will have a shallow depth of field and the background will be out of focus, an aperture of f11 will have a larger depth of field and you should have most things in focus. If photographing an individual object or person, I usually use F5.6 and below. If photographing a group of people or landscape I would usually use F8 and above.
 Shutter speed priority mode
As with aperture, you can adjust the shutter speed either on manual mode or shutter speed priority mode. On the Canon camera, it is located on the wheel as TV (time value), on Nikon, it is S. I don't often use the shutter speed priority mode on my camera. However if I was photographing flowing water and wanted the water to look like it was moving (artistic blur), I would use a slow shutter speed. When using a slow shutter speed you need to use a tripod, as you won't be able to keep the camera still enough. If you don't have a tripod to hand, you can use a wall or your camera bag to rest your camera on. Another good tip is to use the self timer so there isn't any camera shake when you press the shutter release button.
If taking the photo without a trip or something to rest it on you want to avoid going any lower the 1/125 s. If you are going to be holding your camera and need to go below 1/125 because of lighting issues, this is when you need to consider adjusting something else to get in more light (lower aperture or higher ISO).
A good book for explaining exposure better is - Understanding Exposure, 3rd Edition: How to Shoot Great Photographs with Any Camera
White Balance (WB)

You can set your camera to automatic white balance (AWB) and the camera will try and set the white balance according to the type of light you are shooting in. Different type of light casts different type of colours. However it is good to understand what the White Balance symbols mean so you can adjust them yourself rather than letting your camera make the decision for you. The image to the left should help you to work out which setting to choose according to the conditions. For example, if it's a bright sunny day you should select day light, if you are indoors and there are lights on you should determine what type of lights are being used. You can check your photo after taking it, if you are using a digital camera, to make sure the colour of the photo looks true to what you see.
If the White Balance is a little off, you can always adjust this afterwards in your editing software.
Consider Post Editing
Some may think that if you need to edit your photo you haven't taken a good photo to begin with. However photographers who used the traditional method of film and darkroom did their own editing in the processing process in the darkroom. Today the dark room is our computer. By doing small edits like cropping, straightening, colour correction, adjusting exposure, removal of red-eye etc.. the quality of your photos will be dramatically improved.The goal is to take a good photo in the camera, but there's no harm in touching up a photo after it's taken.
The software I use is Lightroom for most of my edits, it's fast and easy to use. For a more in-depth edits such as removing an object from a photo, I would use Photoshop. There is other software you can use for free such as Picasa.
And remember to be selective of what photos you share with others. If you take 200 photos while on a day out, you don't need to show them all to your friends. Select the best and share those. The beauty of digital is you can take many photos and it doesn't cost you anything to develop them.
Here are a few photos from my trip out on Saturday. Enjoy.......


No comments:
Post a Comment